

Since I have started to make a few quilts I have been using more and more pins. I got these wonderful long ones that also have a flat head and can be ironed (and sewed as it turns out!) I found it a bit fiddly to get them in and out of the container and when I got to class for the third time and found the container had popped and splits half a million pins into the bottom of my bag again, I decided I needed to do something about it.
So I googled easy to make pins cushion and using this one for inspiration,
Here's what I did...


Frugal-ness: 5/5 for making my own without having to buy anything
Time cost: About 1/2 an hour all up - probably less for experienced sewers!
Skill level: If you can sew in a straight-ish line - its an easy one for you!
Fun -ness: Great fun - and practical at the same time!
So I googled easy to make pins cushion and using this one for inspiration,

First I cut a 4x4 inch of cloth from an old shirt. Its not going to be seen so it doesn't matter what colour it is.

Then I selected a few scraps from my latest quilt (including scraps that were sewn together already)

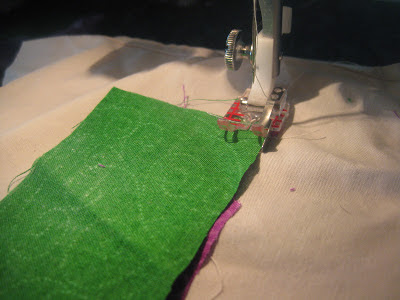
Then with the first patch the right way up, I roughly sewed it to the base.

Then I sewed the next patch to the already sewn patch, right sides together.

And cut it to size when I hd finished sewing (saves guessing!)

Then I pressed the green patch open and repeated the process with the light purple.

and just keep repeating the sewing and opening up and pressing until you have covered the base piece entirely

Just for fun, I used some fancy stitches on my machine and outlined a few patches.

The using a left over peice of patchwork (you could use a plain piece or even crazy patch another piece) I cut the back for my pin cushion.

I placed the back on top of the front and cut around the two pieces to get both the same size (and shape!)

Then i sewed the two pieces together (right sides together) and left a gap to turn it in the right way and to stuff it.

I stuffed it with just scraps and bits material that was lying around.

And hand stitched it shut.

I sewd a button on it - just because I could and took the threads around the outside and tightened them to puff the pillow up a bit more.

I popped the pins in it...

Took a few photos...

and got back to work on my quilt!

I'm getting there - slowly! the camera wont capture the colours properly though...
Pin cushion are a nice easy project and are so easy to personalise! These might be a nice gift if you have a sewer in your life. It might be a good project for school holidays or just cause you are sick of picking your pins out of the bottom of your bag!
I found this great list of pin cushion ideas that you might want to browse if your are in the mood to make a pin cushion this weekend!
Score card:
Green-ness: 5/5 for making one out of scraps destined for the binFrugal-ness: 5/5 for making my own without having to buy anything
Time cost: About 1/2 an hour all up - probably less for experienced sewers!
Skill level: If you can sew in a straight-ish line - its an easy one for you!
Fun -ness: Great fun - and practical at the same time!
Comments
The one that I saw the crazy patching on an used as inspiration was a wrist band one! I have never used one and never seen one in use so I wasn't sure if it was a gimmick or in fact a useful thing. Since you like yours I might make one and see how it works for me! Cheers! - K xx